|
Diva Help Pages
Making A Graphic Set
What
do I need to know to make a graphic set?
What do I need to make a Graphic Set?
How to Make a graphic Set
What other things are important in making
a graphic set?
 What
do I need to know to make a graphic set? What
do I need to know to make a graphic set?
Making a graphic set isn't as hard
as you may think. If you want to make a graphic set for your site, you
need to know a few things about graphics.
You have to have a program for making graphics.
You then need to find a graphic to make one with if you cannot draw.
Back To top

What
do I need to make a Graphic Set?
You need a program for making graphics.
I use Paint Shop Pro (PSP) and you can get a trial version Free
Trial PSP here. Once you have the program, you need to find a graphic
to make a graphic with, unless you are very artistic and can draw.
Back To top
How
to Make a graphic set
First you need to get a graphic
and since I already described the process of making one in PSP, I made
a set with it.
Let's begin and start making a graphic set. I will supply one here. Save
it to your hard drive so you can work with it. The actual size of the graphic
is 305 x 390 pixels. I've just reduced the size in the coding so when you
save it, it will be the actual size. Remember where you saved it to.
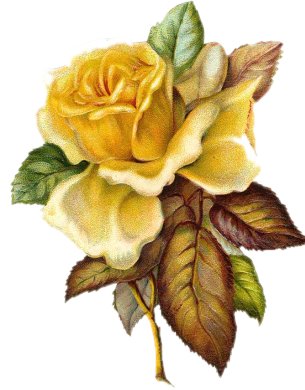
Nice graphic but not very good for
a set...but we can change that. Open Paint Shop Pro (I have PSP 4,5 and
6 but am comfortable with PSP 5).
I don't think that the versions are that much different but you'll have
to manage with what I know. Sorry :)
Now find the graphic and open it in PSP. You NEVER work with the original
graphic, so lets make a copy of it now so you can work with the copy.
Go to Selections, Now Select All, Go to Edit and Select Copy and then Paste
as New Selection. Now you have a new graphic to work with...so close the
original and leave it alone. Save this new graphic as yellowrose2.jpg (just
so you know that you have made a copy of the original.
Now to make a new graphic, we need to get rid of the white background so
we can use the graphic as a gift. Here are the instructions to remove the
color.
For a complete description and graphic of the PSP
Tool Palette , click to view
There are many ways to clean a graphic but the one I most frequently use
is the magic wand.
1)  Click on the magic wand, a control
panel should be showing, set the Feather to 6, Match Mode - RGB Value and
Tolerance -10. Click on the white part of the graphic on the left side.
You will see marching ants around the area that you have just clicked on.
This is the area you will remove. Click on the magic wand, a control
panel should be showing, set the Feather to 6, Match Mode - RGB Value and
Tolerance -10. Click on the white part of the graphic on the left side.
You will see marching ants around the area that you have just clicked on.
This is the area you will remove.
Put your cursor over the marching ant area and you will see this  the Mover. Take the white part entirely off the graphic. Since I am doing
this with you, there is still a part of the white left on the right side.
Repeat the same steps for the second half of the white. Now it looks like
all of the white area has been removed, but it hasn't.
the Mover. Take the white part entirely off the graphic. Since I am doing
this with you, there is still a part of the white left on the right side.
Repeat the same steps for the second half of the white. Now it looks like
all of the white area has been removed, but it hasn't.
If you enlarge the pic (View - Zoom in 3-1) You will see a small shadow
around the picture. Starting at the left, click as close to the rose as
possible...a thick line should appear half way around the rose. Remove
that as well. Now go to the right and do the same thing.
Then to test and see if the graphic is entirely cleaned, I click on the
left side. If the marching lines do not go completely around the graphic....then
it is not cleaned.
I then use the Selection Tool  and
set it to Elipse in the Control - Tools Control panel and Feather 6. Then
I proceed to clean around the area checking with the Magic Wand tool to
see which areas are left. The two areas you will have to clean using Elipse
is above the green leave at the top of the graphic and the brown leaf on
the right hand side. Once you remove the two parts there, you will be able
to see using the magic wand that the ants now go completely around the
graphic. Once I get the magic wand to go completely around the graphic...then
I know that it is clean. and
set it to Elipse in the Control - Tools Control panel and Feather 6. Then
I proceed to clean around the area checking with the Magic Wand tool to
see which areas are left. The two areas you will have to clean using Elipse
is above the green leave at the top of the graphic and the brown leaf on
the right hand side. Once you remove the two parts there, you will be able
to see using the magic wand that the ants now go completely around the
graphic. Once I get the magic wand to go completely around the graphic...then
I know that it is clean.
Now save it as yellowrose1.psp....by
saving in PSP, you have the clear graphic to work with. In PSP format the
grey and white checkered boxes are totally invisible so you have a complete
transparent rose at this time. If you put it on any background, the only
thing showing will be the rose and the background.
Because you cannot post a psp format on a webpage, you may right click
below and save it to your computer and then open to view in PSP
Click here to view it
Because it is actually transparent,
I have already made it into a graphic as seen below.

Back To top
How
to Make a graphic set
Now we have a transparent graphic
in psp format. So now we need to make a set using this graphic. The set
I will show you how to make will be easy. You can add this graphic to another
graphic and make a set with that..but let's just use the one yellow rose
to make a set with.
I make templates when I have time and that way when making a set I simply
bring up a template, color it and then use it with a graphic.
Here is a template you can use. It has tons of bars that I made with Dingbat
Fonts ( Font Page )
Template Set
Now I color the template (I let PSP pick out my color choices by making
a copy of the graphic I am using and then to Colors - Decrease Color Depth
to 250 and the color palette will show the colors that PSP has found in
the graphic ) I love it when something else can do the work for me. Once
I have a color I make sure to use the same methods of coloring for every
graphic. If you move or adjust one of the settings, the set won't match.
So I usually color the whole set at once and then rename them to keep my
template.
Once I color the set, I now start to make it. Here are the steps I take:
1) Take the graphic called "beige2blankborder_pattern.jpg". This
is the main graphic I work with when making the set.
2) Go to Selection, Select All. Go to Edit, Copy and Paste as a New Image.
3) Now open the graphic "yellowrose1.psp". We know that the size
of this graphic is 305 x 390 and if I add this size, it will be a very
large topper. So I decide here whether to reduce it or cut it up (thus
making smaller graphics that load quickly). You can get the Dicer Program
here
4) So I've decided to reduce the size of the graphic. I reduce it ( Go
to Image, Resize) to 250 x 320. I then save it as yellowrose1_250x320.psp
5) I now resize and add 20 pixels mnore than the graphic size of the yellow
rose to the width and height of the beige2blankborder_pattern.jpg. Then
I go to Edit. Copy and Paste as a New Selection and add that over the now
reduced beige2blankborder_pattern.jpg. Then I add the yellowrose1_250x320.psp
and save my new graphic as yellowrosetop.jpg (Save in in jpg format.)
6) I now make a smaller top by repeating Steps 3 to 5 over again but this
time reducing the yellowrose1_250x320.psp to 150x200 and then I rename
the new graphic yellowrose1_150x200.psp and then I reopen the graphic beige2blankborder_pattern.jpg
and Go to Selections, Select All, Edit, Copy and paste as a new selection.
I then reduce the beige2blankborder_pattern.jpg graphic to 20 pixels more
than the yellow rose one, so now it is 170x220 and then I Go to Edit, Copy,
Paste as a New Selection and add it over the reduced beige2blankborder_pattern.jpg
(which is now 170x220. Then I add the yellow rose graphic yellowrose1_150x200.psp
and then save this new graphic as yellowrosetopsmall.jpg (Save it in jpg
Format).
So now I have two tops, one large one and one small one, so I will finish
making the set before I add the text.
7) I like to do the bars and line and then the button. So I open beige2line.jpg
which is already to go as is. Now I reduce the yellow rose graphic ( yellowrose1_150x200.psp
) to 70x80 and save it and call it yellowrose1_70x80.psp. I will need to
reduce it once more to have all the sizes I need to make the set but I
need this size for my line graphic. Now I add the yellowrose1_70x80.psp
to the right hand side of the graphic called beige2line.jpg. Then I go
to Edit, Copy, Paste as New Selection and then add it to the left side
but I must first change the way it is facing. So I go to Image, Mirror
and that reverses the way the graphic is facing and then I add it the the
line graphic and save that as yellowroseline.jpg (Save it in jpg Format).
8) Now the bars. First I open beige2bar1.jpg and I already know that the
width of it is 470 and the height of it is 70. So now I reduce the yellow
rose pic ( yellowrose1_150x200.psp ) to 50x60 and save it and rename it
as yellowrose1_50x60.psp and then I add it to the beige2bar1.jpg graphic
on the right side and then repeat set I did on the line to change the direction
it is facingand then add to the left side.
9) I can do the button now since I will need the same size of the yellow
rose graphic to add to it. So open the graphic called beige2blankbutton.jpg
and add the yellowrose1_50x60.psp to it on the right hand side. Then save
it as yellowroseblankbutton.jpg (Save it jpg Format)
10) The set is almost done and before long, I will be adding the text.
I usually like to add some buttons to my sets using various parts of a
graphic..but this one only has a yellow rose. So I open beige2bg.jpg, Make
a copy, Selection, Select All, Edit, Copy, Paste as a New Image and then
I reduce the size of that to 60x60 and the go to Edit, Copy, Paste as a
New Selection and add that on top of the 60x60 graphic I just made. Then
I add the yellow rose graphic that is resized to 50x60 and then I save
it as yellowrosebutton1.jpg. Then I go to Image, Click Mirror and then
I save the same graphic again and call it yellowrosebutton1a.jpg.
11) Now I need to find out the colors that will work for my text and also
the exact color of the colored background I made,so I open up beige2blankborder_pattern.jpg.
Go to my Selection Tool . This
will open the Control Panel on the right hand side. I click on Rectangle
cut and then I go inside of beige2blankborder_pattern.jpg and take a big
chunk and go to Edit, Paste as a New Image. Then I go to Colors, Decrease
Color Depth to 256 Colors. The Color Palette Tool now offers me tons of
choices. I choose a background color from the palettte by clicking on the
bottom color palette. I then click on File, New. A box will appear and
make sure your settings are at these sizes. The Width I set for 1250, Height
I set for 350, Resolution=72 and Image Characteristics I have the Background
Color and Image type is set to 16.7 Million Colors. Then I apply the cutout
from the yellowroseblankborder.jpg to see if it matches. If not, I just
keep chosing another color and adding the piece from the yellowroseblankborder.jpg
until I get a match. Once I get a match, I then go to File, New Image and
then go to the Color Palette and when I click on the bottom one, I get
the color Number. I then copy and paste that number to the new image I
just made from the backgroud color. The color I found that matched the
best is#584D2A. Now I need to find a text color that matches. I open the
yellowrosetop.jpg graphic and make a copy of it (Selections, Select All,
Edit, Copy and Paste as a New Selection, Image, Colors, Reduce Color Depth
to 256 Colors. Then I click on the top of the Color Palette and pick a
color from there. It will be showing all the colors that it found in the
top graphic called yellowrosetop.jpg. I picked #F7CF3F and then I copy
and paste it on the new graphic I had made with the background Color number
on it. I then choose a font and using 48 size pixel...I type on the new
graphic the following:
Background Color=#584D2A
Font Color=#F7CF3F
Font Face=VictorianD then I save it as yellowrosecolors.jpg.
Now if I ever have to add or change something to this set...I have a record
of the colors and font I used to make it.
Now I make one more graphic and then I add the text to everything. I take
the yellowroseblankborder.jpg and Selection, Select All, Edit, Copy, Paste
as A New Image, I reduce the size too 350x 80 and save it as yellowroseblanktext.jpg.
Now I am ready to finish the set. I go to the text tool and type in Welcome and now I go to Image, Effects, Drop Shadow. I
set this the drop shadow settings at:
and type in Welcome and now I go to Image, Effects, Drop Shadow. I
set this the drop shadow settings at:
Color=Black
Opacity=100
Blur=3.3
Vertical=1
Horizontal=-1 and then click Okay.
I save that graphic as yellowrosewelcometext.jpg
Then I do the same for the buttons. After I type the text on them,
I save it as the name of the button, yellowroseback.jpg and then I
undo it (Edit, Undo Text) and you will see the floating ants appear on
the text back. So now I type in home and then save it as yellowrosehome.jpg
and repeat the steps until all the buttons are made.
The end result can be seen here. Making
Sets
Back To top
|