|
Diva Help Pages
Making Diced Graphics
Why
do I need to Dice a Graphic?
What do I need to know to make diced graphics?
What do I need to make Diced Graphics?
How to Make Diced graphics?
 Why
do I need to Dice a Graphic? Why
do I need to Dice a Graphic?
Dicing a grapic comes in really
handy when making a graphic set or when making a Image Map. If you want
to make a great set and have a large graphic to use for the header, you'll
need to dice it to reduce loading time. If you also want to make an Image
Map for your site, you will need to dice the links to the graphics.
Back To top

What
do I need to know to make Diced Graphics?
Making diced graphics is easy since
there are now programs that will dice any graphic you make. You have to
have a program for dicing graphics.
Back To top
What
do I need to make Diced Graphics?
You need a program for dicing graphics.
I use a program call Dicer 039. You can acquire it here.
It is a freeware program.
Back To top
How
to Make Diced graphics?
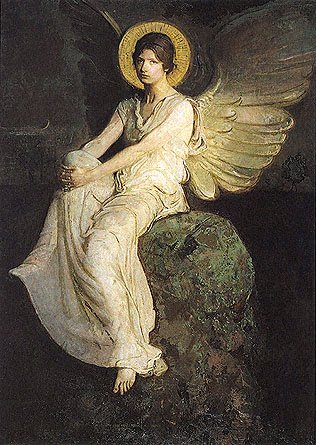
Let's begin by taking a graphic
and dicing it as a sample. Here is a graphic that I have by the Old Master
Painters. Now I have made a set with this graphic but as you will see this
graphic is 316 pixels wide and 445 pixels high. Way to large for a topper/header
pic.
If I crop it, it will loose what the artist wanted others to see in his
artwork. I want the full artwork showing but making a really small header/topper
would take away from the top, so I do reduce the graphic but not by much.
What I do then is dice the graphic so it loads quickly. The smaller the
graphic, the quicker the load time.
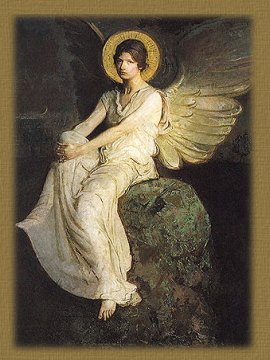
Nice graphic but not very good for
topper since the size is very large. So I went ahead and feathered it and
then reduced the size of the graphic to 250 pixels width x 340 pixels height
and added my background which I sized at 20 pixels more now making the
graphic 270 pixels width and 360 pixels height.
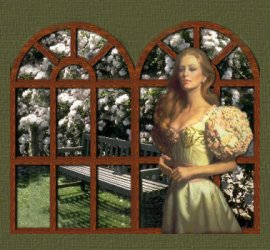
Now here is what the new graphic looks like. I have already added it to
the background I will be using for the set, so here it is.
Now this graphic looks good but
the size of it will cause a very slow loading page, so here comes the Dicer....
I open the Dicer (which I keep on my desktop) follow the path to the topper
set I made with it and then open the topper image. Go to File, Click on
Open Image, follow the path to the topper and once opened you are able
to dice it either horizontally or vertically. Your choice.
Then click on Process Image, and bang now the topper is in two smaller
graphics, but what makes this really good is that now they will match each
other totally correctly.
For some time I spent hours trying to cut a guestbook graphic in half and
never could get it to match perfectly, no matter how I did it. Then I discovered
this little program and wow...what a difference it makes.
Hopefully, you've stored a shortcut on your desktop to access the Dicer
program.
Go to File, Open Image and follow the path to the set you are making. Click
on the grahic "angel034topper.jpg" and it will open the graphic
in the Dicer. Decide which way you want to dice the graphic.
Left click on mouse and it cuts the graphic vertically and right clicking
cuts the graphic horizontally. Now go to file, and click Process Image.
It will dice the graphic and place it in the same folder as the graphic
set it came from. It will rename them into as many graphic pieces as you
have made and provide a two extra files as well. They will be called "Ange.htm"
and Ang.grd.
If you opent the htm file, you will see all your graphics perfectly aligned.
They use a table for each piece but I find one table is fine to enclose
the graphics and keep them aligned perfectly. As well the program creates
tons of useless coding. I simple make one table (see below).
Now I rename the graphics to match my set name so I call them angel034top1.jpg
and angel034top2.jpg". Since I cut mine vertically, I DO NOT need
to put a <BR> tag between the graphics to align them.
So I then put a table to hold them perfectly aligned and the table looks
like this:
<CENTER><TABLE BORDER=0 CELLSPACING=0 CELLPADDING=0> <TR>
<TD><CENTER><IMG SRC="angel034top1.jpg" BORDER=0
WIDTH=133 HEIGHT=360><BR> <IMG SRC="angel034top2.jpg"
BORDER=0 WIDTH=137 HEIGHT=360></P></CENTER> </TD>
</TR> </TABLE></CENTER>
This table now shows the two graphics perfectlly aligned and straight.
 View
the Set I Made with This graphic View
the Set I Made with This graphic
 Graphics
Page Graphics
Page
Back To top
|